Use the Accessibility Checker
Ensuring that your PowerPoint presentations are accessible to all people, PowerPoint provides a built-in tool called the Accessibility Checker, designed to help you identify and address accessibility issues in your slides.
Open Accessibility Checker
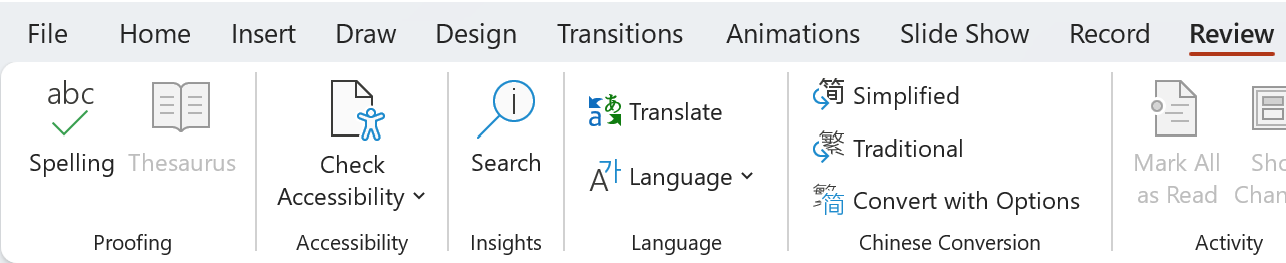
- Select the Review tab.
- Select Check accessibility to open the
Accessibility pane on the right.
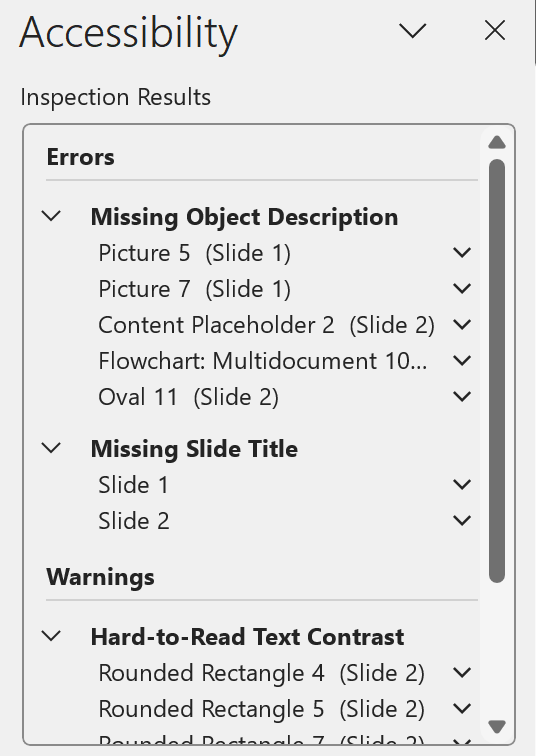
- In the Accessibility pane, review and address the findings under Inspection Results.
Apply recommended actions
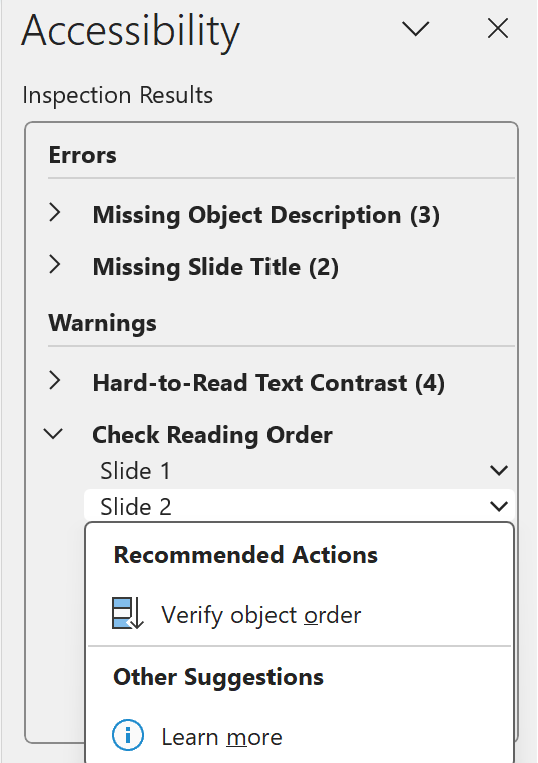
In the Accessibility pane, you'll see a list of errors and warnings, with how-to-fix recommendations for each.
- In the Accessibility pane , select an issue under Warnings or Errors. The list expands and shows the items and objects affected by the issue.
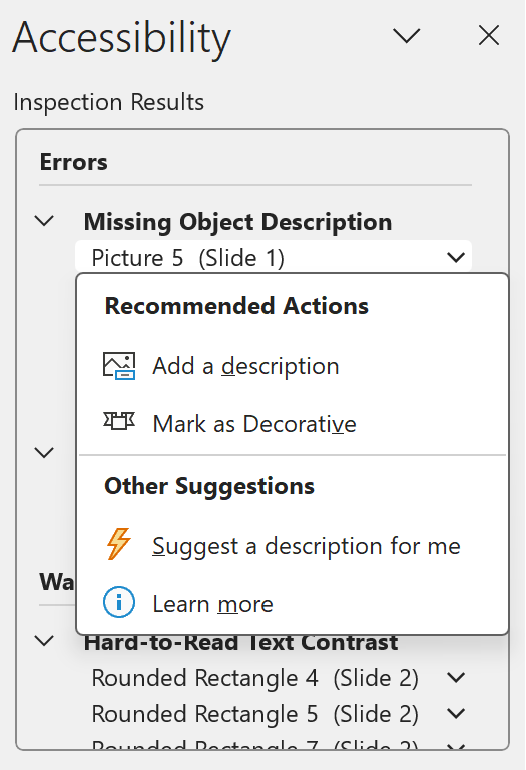
- To address the issue, select the down arrow button next to
it and open Recommended Actions list.
- To apply a fix, select an action from the
Recommended Actions list.
To view more options, select the right arrow button next to an
action (if available).
- Go through and resolve each issue under Warnings and Errors.
Don't see the Accessibility Checker?
If you don't see Check accessibility button Check Accessibility on the Review tab, you might have an older version of the app. Follow these steps to open the Accessibility Checker:
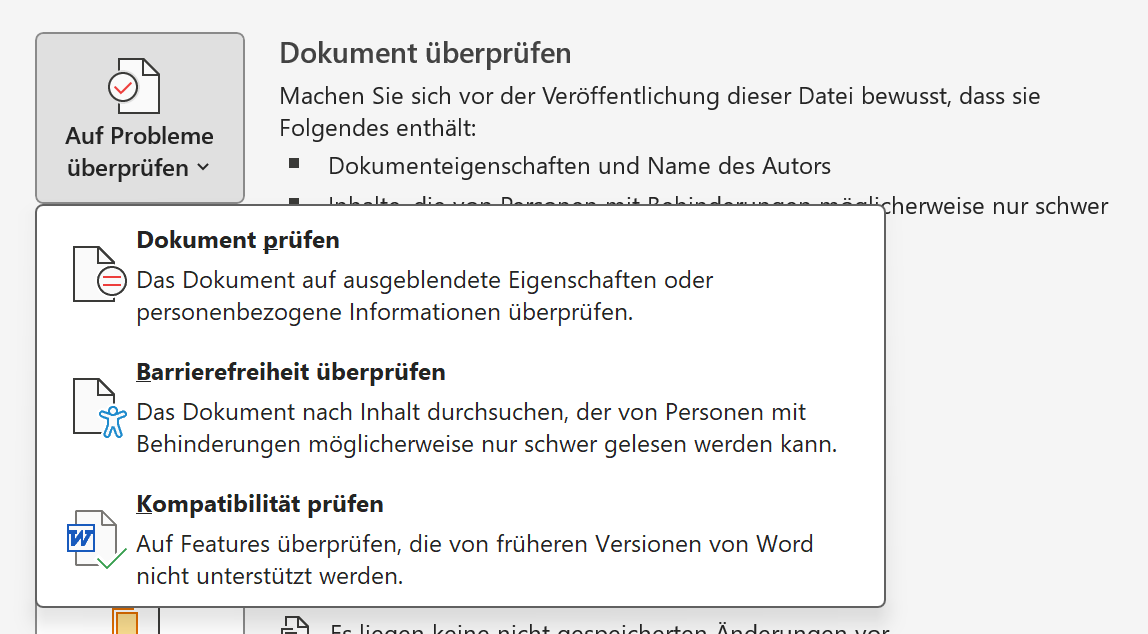
- Select File and choose Info.
- Select Check for Issues.

- In the Check for Issues drop-down menu,
select
Check accessibility button Check Accessibility.
- TheAccessibility Checker task pane appears next to your content and shows the inspection results.
- Select an issue under Inspection > to see why and how to fix an issue. This info appears under Additional Information.
Set the reading order
In PowerPoint, ensuring that your presentation is accessible and follows a logical reading order is crucial for accessibility. The Reading Order pane is a powerful tool that allows you to review and adjust the sequence in which content is read by screen readers or other assistive technologies.
Check the reading order of slides
- With your presentation open, select Review Check
Accessibility.
- Select the Check reading order category in the
Warnings
section to open the list. When the reading order of the objects on a slide
doesn't match one of the common ways objects are spatially ordered,
Accessibility Checker lists the slide here.
- Point at a slide number in the list, then select the adjoining
drop-down arrow. Select theVerify object ordercommand.
Change the order of objects
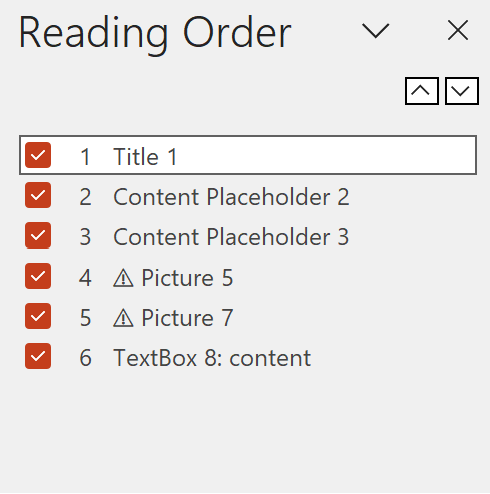
Objects are listed in the order that the screen reader will read them in. The
number next to each object indicates the position in the sequence. Objects
without a number will be skipped because they are marked decorative.
If the order of the objects isn't logical, people using screen readers will have
a difficult time understanding the slide.
To change the order that the objects are read in:
- Select one or more items in the list. (Use Ctrl+Click to multi-select).
- Drag the selection upward or downward, or click the up arrow
(Move Up) or down arrow (Move Down).
Group objects into logical units
If you have complex diagrams or illustrations made of many objects, group the
objects into logical units. That way, the screen-reader user can read the
grouped units rather than all of the individual objects in them. And you'll only
need to order the units and not all of the objects in them.
In cases where grouping may be beneficial, a tip appears at the bottom of the
Reading Order pane on slides:
To group objects:
- n the pane, use Ctrl+Click to select the items you want to group.
- On the … Format tab at the right end of the
ribbon, select Group > Group (or Arrange
> Group > Group).
After you group the objects, only the group appears in the Reading Order pane, rather than all the objects in it. Click the item and then enter a description for the group.
Title a Slide
Give every slide a title
One simple step towards inclusivity is having a unique, descriptive title on each slide, even if it isn't visible. A person with a visual disability that uses a screen reader relies on the slide titles to know which slide is which.
- Select Review > Check Accessibility. The Accessibility ribbon is displayed, and the Accessibility pane opens to the right of the selected slide.
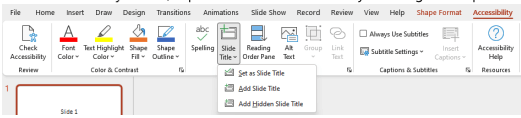
- On the Accessibility ribbon, expand the Slide Title menu by selecting the dropdown arrow.
 "
"
- Select one of the following options:
- To move the cursor to the title placeholder, select Edit Slide Title.
- To add a title placeholder to the slide and move the cursor to the placeholder, select Add Slide Title.
- To add an off-slide title placeholder and move the cursor to the placeholder, select Add Hidden Slide Title. Because the title is positioned off-slide, it will be invisible during a slide show, but the title is available to help users navigate or select the slide.
- If there is no title placeholder on the slide, to let the Accessibility Checker select the text box or shape that seems most like a title, select Set as Slide Title. This makes the selected object your slide title. If there is another text box or shape you want to use as the title, select the object, and then choose this option. Only objects with text that aren't in groups can be made into a title.
-
Selecting the Slide Title button without expanding the dropdown menu does the following:
- If an object that can be set as the title is selected on the slide, that object is set as the slide title (Set as Slide Title).
- If there is a title, but no object is selected, the cursor moves to the title placeholder (Edit Slide Title).
- If there is no title and no object is selected, a title placeholder is added and the cursor moves to the placeholder (Add Slide Title).
- Type or edit the slide title.
Here is the link to Title a slide
Hide a slide title
You can position a title off the slide. That way, the slide has a title for accessibility, but you save space on the slide for other content. For instructions, go to Title a slide and expand the "Put a title on a slide, but make the title invisible" section.
Use accessible colors and styles in slides
Use an accessible templaten PowerPoint, you can search for and use pre-defined accessible templates.
- Open PowerPoint.
- Type accessible templates in the search text field.
- To see information about an accessible template, select it.
- To open a new presentation based on the selected template, select Create.
- To see other color, style, and font options, browse the PowerPoint themes. On the Design tab, expand the Themes menu and select a theme that suits your purposes.
- Off-white backgrounds are better for people with perceptual differences, like dyslexia.
- Select templates and themes with sans serif fonts that are 18 points or larger.
- Look for solid backgrounds with contrasting text color.
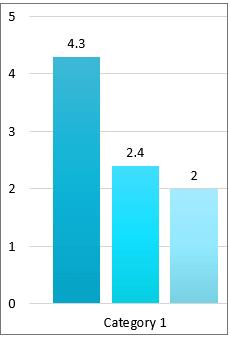
- To make information more accessible, differentiate it in more than one way. In the image below, both color and text differentiate information:
 "
"
Here is the link to Use accessible colors and styles in slides
Design slides for people with dyslexia
Font- Use simple, sans serif fonts with adequate spacing between letters. Use at least an 18-point font size. Good sans serif font examples include:
- Calibri
- Franklin Gothic Book
- Lucida Sans
- Segoe UI
- Avoid compressed, fancy, italic, or underlined fonts or fonts with uneven line weights.
To reduce the reading load, select familiar sans serif fonts such as Arial or Calibri. Avoid using all capital letters and excessive italics or underlines.
A person with a vision disability might miss out on the meaning conveyed by particular colors. For example, add an underline to color-coded hyperlink text so that people who are colorblind know that the text is linked even if they can’t see the color. For headings, consider adding bold or using a larger font.
To keep your text easily readable, leave some space in your slides.
- Ideally, limit the number of lines on each slide to 7.
- Ideally, limit the number of words on each slide to 6.
- Leave plenty of space above and below each line.
- Instead of adding all the content on a slide, use speaker notes to provide more in-depth information. By default, speaker notes are formatted in a readable, sans serif font.
- Distribute your slides after your presentation, so your audience can refer to the slides and notes later to recall the verbal presentation delivery.
Here is the link to Design slides for people with dyslexia
Create accessible hyperlink text
People who use screen readers sometimes scan a list of links. Links should convey clear and accurate information about the destination. For example, avoid using link texts such as "Click here," "See this page," "Go here," or "Learn more." Instead include the full title of the destination page.
Link to a website- Select the text, shape, or picture that you want to use as a hyperlink.
- Select Insert > Hyperlink.
- Select Existing File or Web Page, and add the:
- Text to display: Type the text that you want to appear as hyperlink.
- ScreenTip: Type the text that you want to appear when the user hovers over the hyperlink (optional).
- Current Folder, Browsed Pages, or Recent Files: Select where you want to link to.
- Address: If you haven't already selected a location above, insert the URL for the web site you want to link to.
- If you link to a file on your computer, and move your PowerPoint presentation to another computer, you'll also need to move any linked files.
- Select OK.
- Select the text, shape, or picture that you want to use as a hyperlink.
- Select Insert > Hyperlink and select an option:
- Place in This Document: Link to a specific slide in your presentation.
- Create New Document: Link from your presentation to another presentation.
- E-mail Address: Link a displayed email address to open up a user's email program.
- Fill in the Text to display, ScreenTip, and where you want to link to.
- elect OK.
Here is the link to Add a hyperlink to a slide
Avoid using tables
In general, avoid tables if possible and present the data another way, like paragraphs with headings. Tables with fixed width might prove difficult to read for people who use Magnifier, because such tables force the content to a specific size. This makes the font very small, which forces Magnifier users to scroll horizontally, especially on mobile devices.
If you have to use tables, use the following guidelines to make sure your table is as accessible as possible:
- Avoid fixed width tables.
- Make sure the tables render properly on all devices, including phones and tablets.
- If you have hyperlinks in your table, edit the link texts, so they make sense and don't break mid-sentence.
- Make sure the slide content is easily read with Magnifier. View it on a mobile device to make sure people won’t need to horizontally scroll the slide on a phone, for example.
- Use table headers.
Screen readers keep track of their location in a table by counting table cells. If a table is nested within another table or if a cell is merged or split, the screen reader loses count and can’t provide helpful information about the table after that point. Blank cells in a table could also mislead someone using a screen reader into thinking that there is nothing more in the table. Use a simple table structure for data only and specify column header information. Screen readers also use header information to identify rows and columns.
To ensure that tables don't contain split cells, merged cells, or nested tables, use the Accessibility Checker.- Place the cursor anywhere in a table.
- On the Table Design tab, in the Table Styles Options group, select the Header Row checkbox.
- Type your column headings.
- Test accessibility with Immersive Reader.
Add alt text to visuals
Alt text helps people who use screen readers to understand what’s important in the visuals in your slides. Visual content includes pictures, SmartArt graphics, shapes, groups, charts, embedded objects, ink, and videos.
In alt text, briefly describe the image, its intent, and what is important about the image. Screen readers read the description to users who can’t see the content.
Avoid using text in images as the sole method of conveying important information. If you use images with text in them, repeat the text in the slide. In alt text of such images, mention the existence of the text and its intent.
Improve image accessibility in PowerPoint
Tips for improving image accessibility- In addition to color, use text, patterns, or shapes to communicate ideas.
- Add descriptive alt text to pictures, charts, and other visual objects.
- Group layered images, like a picture with callout lines, into a single object.
- To get an idea how your slides might look to someone who’s colorblind, use the color filters feature in the operating system.
- Right-click a chart, picture, or other visual object, and select Edit Alt Text.
- In the Alt Text pane, type a description for the object.
- Add information about the slide and its visual content to the presentation notes underneath the slide.
To make sure that the screen readers can make sense of layered images, group them into one single image.
- To select the images you want to group, press and hold Shift and then click each image.
- Select Format > Group > Group.
- Add alt text to the grouped image.
Create closed captions for a video/audio
In PowerPoint for Windows, macOS, and web, you can create closed caption files and add them to the videos or audio files in your presentations.
Adding subtitles makes your presentation accessible to a wider audience, including people with hearing impairments and people who speak other languages.
Closed captions can be stored in a text file with a .vtt filename extension. You can create a closed caption file yourself or use a caption-creation tool. This article describes how you can create a closed caption file yourself in Notepad.
Notepad is automatically installed with Windows. Start the app by typing Notepad in the Cortana Ask me anything box or by searching for Notepad on the Start menu.
When Notepad is open, save your closed-caption file with a name in the following format:
MyClosedCaptions.en.vtt
Include the standard locale name such as "en" (for English) or "es" (for Spanish). The file name extension must be ".vtt".
- In the Save As dialog box in Notepad, enter a name in the File name box including the .vtt filename extension and enclose the entire name in quotation marks.
- In the Save as type box, select All Files (*.*). These actions ensure that the file is saved with the required .vtt filename extension (rather than a .txt extension).
 "
"
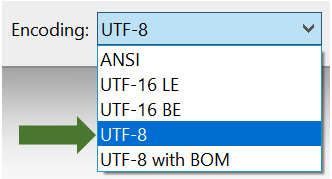
-
In the Encoding box, select UTF-8. (This option ensures that any complex characters, such as international characters will be displayed accurately on the screen.)
 "
"
Add content to the file
The first line in the file must be:
WEBVTT
Subsequent entries in the file are called "cues," and they consist of:
-
A time marker (beginning time and end time, separated by an "arrow," -->).
Each time marker is designated in the following format: hh:mm:ss.ttt
Use two digits each for hours (hh), minutes (mm), and seconds (ss). Insert colons (:) to separate the hours, minutes, and seconds without a space in between. Include a period after ss, followed by three digits for thousandths of a second (ttt). Ensure that there is no space in the time format.
In PowerPoint, the timer in the Edit view of the toolbar for playing videos can help you to ascertain the starting and ending times to be specified in the caption file:

Ensure that you add the hours (00:) at the beginning and a third digit after the period to comply with the required time format. - Text that needs to appear on the screen during that particular segment of time.
(Limit yourself to a maximum of three lines of text to ensure all the words fit on the screen.)
Example:
WEBVTT
00:00:01.000 --> 00:00:05.330
Good day everyone, my name is June Doe.
00:00:07.608 --> 00:00:15.290
This video teaches you how to
build a sandcastle on any beach.
In the example above, the first caption appears after the video has played for one second, and it remains on the screen until 5.330 seconds of the video have elapsed. The next caption appears after the video has played for 7.608 seconds, and it remains on the screen until 15.290 seconds of the video have elapsed. The second caption is split into two lines to ensure that the statement is not too wide to fit on the screen.
Here is the link to Create closed captions for a video