Automated Accessibility Testing
There are two stages to ensuring that a website or software application is accessible: automated testing and manual testing.
Begin by using an automated tool to scan pages for accessibility errors. Use a tool that references WCAG 2.x AA standards and focus on resolving both A and AA errors.
- Chrome plugin: ARIA Validator
- SiteImprove Website Accessibility Checker
- WAVE Tool
The SiteImprove Website Accessibility Checker is a free tool available through a web version and as a Chrome browser extension.
The Accessibility Checker should be run on every individual webpage.
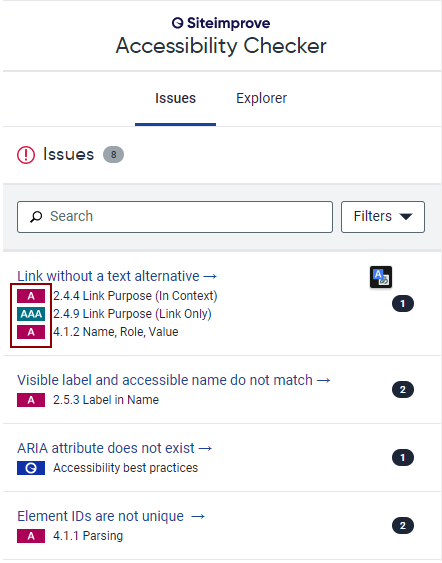
The checker identifies errors based on WCAG criteria. In the summary, it shows all levels criteria (A, AA and AAA), but you primarily need to pay attention to A and AA errors. The following example has the error “Link without a text alternative,” and the description includes both A and AAA criteria. This error should be resolved because the issue involves A errors.
Click on the error to get more information about it.
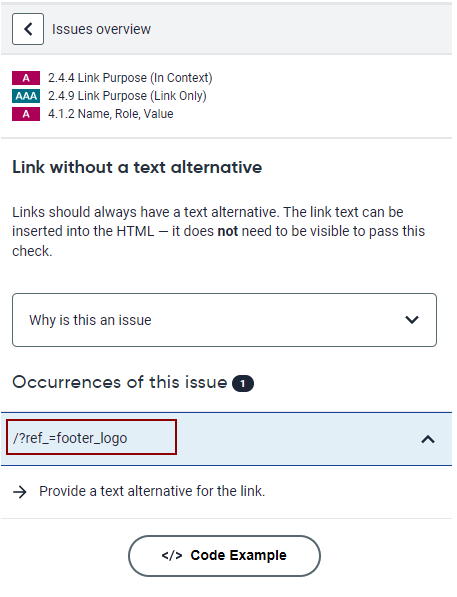
The detail screen explains why this is an issue and also gives code examples of how to fix it. Click on Occurrences of this Issue to locate the specific occurrences on the page.
The WAVE Tool is a free web accessibility checker by WebAIM. It’s available through a web version and as a Chrome browser extension. The Chrome extension is more robust.
The WAVE tool should be run on every individual webpage. Make sure to expand accordions, since the tool only scans visible content.
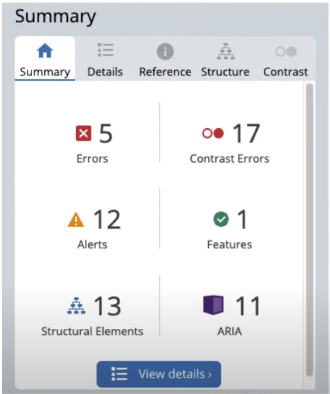
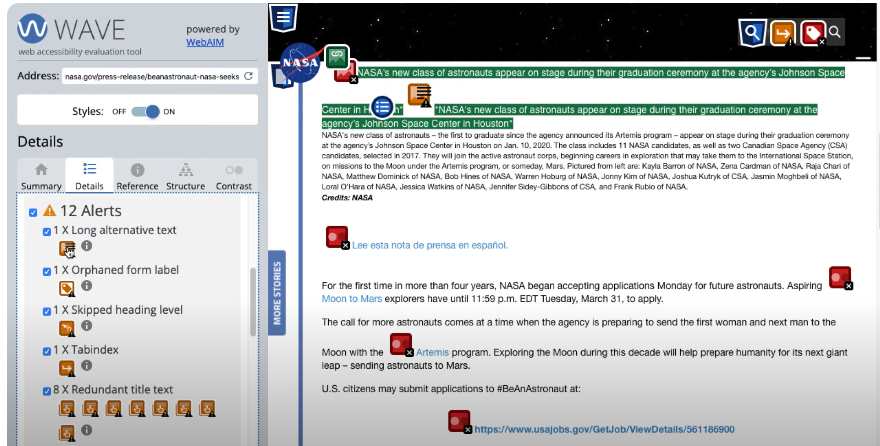
WAVE displays a summary of its findings in a sidebar on the left of the window. These findings are organized into six categories: Errors, Contrast Errors, Alerts, Features, Structural Elements, and ARIA.
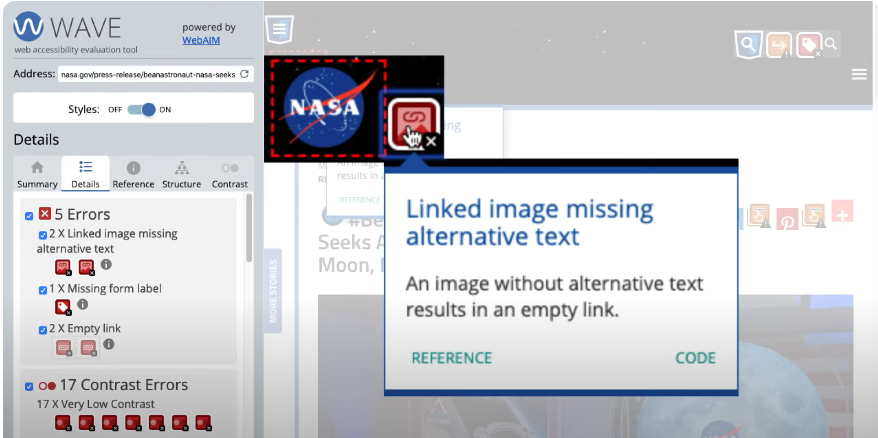
Errors
- Red Errors indicate issues that will impact certain users with disabilities.
- Failures to meet requirements in the Web Content Accessibility Guidelines (WCAG).
If you click on a symbol in the "details"- area, its position on the website will get highlighted.
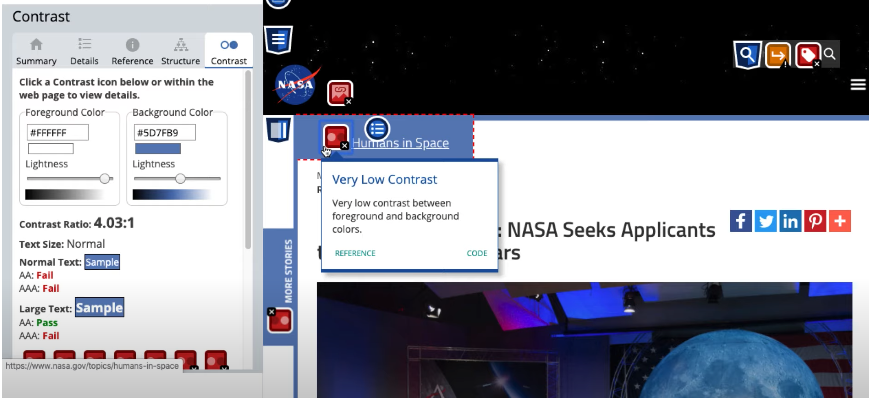
Contrast Errors
- These errors are instances of text that do not meet WCAG contrast requirements.
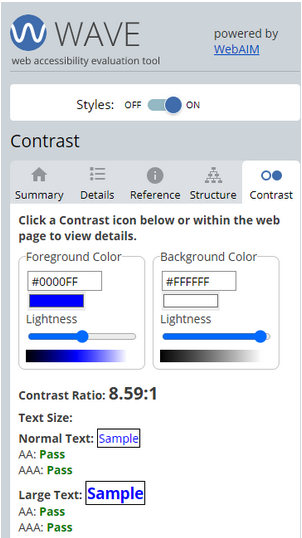
- The contrast panel shows the foreground (or text) color, the background color, the contrast ratio, and whether the text size is normal or large.
- Manual testing is required for images with text.
- Manual testing is necessary when elements with transparency or background gradients are present.
Alerts
- Elements in the page that may cause accessibility issues.
- An evaluator must decide the impact, if any, of Alerts.
If you click on a symbol in the "details"- area, its position on the website will get highlighted.
Features
Green icons indicate Features that will improve accessibility if implemented correctly.
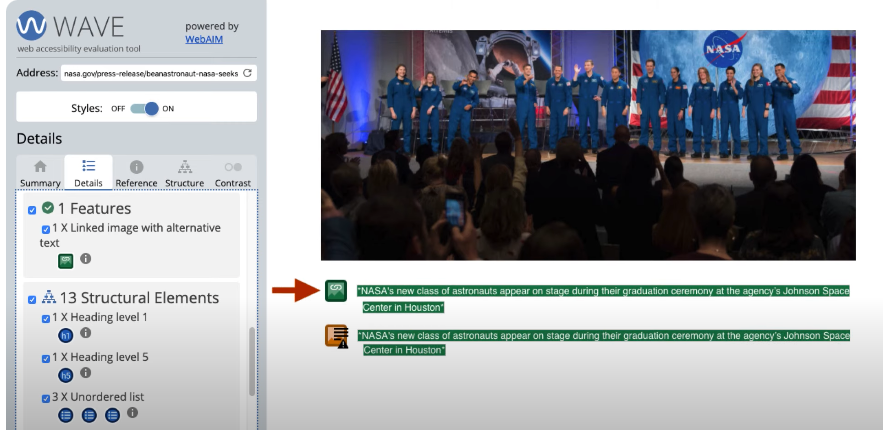
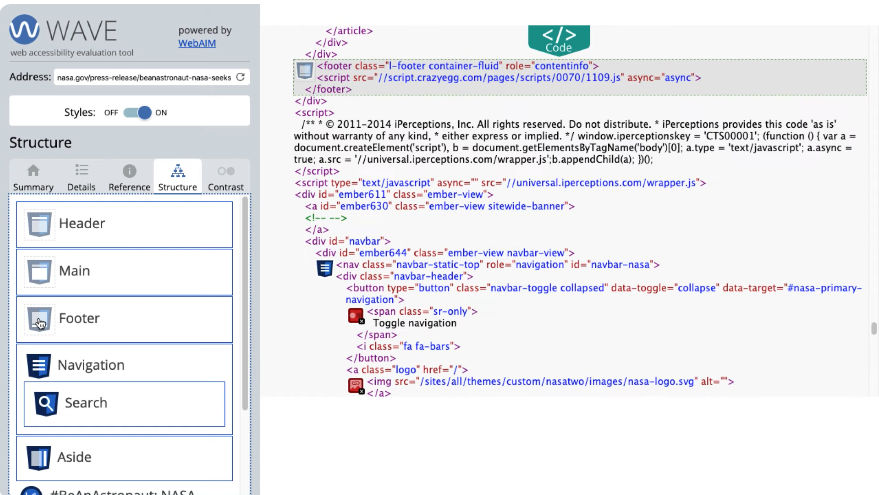
Structural Elements
- This panel shows page regions that have been identified through HTML or ARIA.
- Shows the heading structure of the page.
- Identifies any page elements that are hidden.
- Lists the regions and headings in order.
- Indicates any nesting of page elements.
If you click on a symbol in the "details"- area, its position on the website will get highlighted.
ARIA
- ARIA can be used to present important accessibility information to people with disabilities, but it must be used very carefully.
- Unfortunately, a website will be less accessible when ARIA is used incorrectly, which often is the case.

Color Contrast Tools
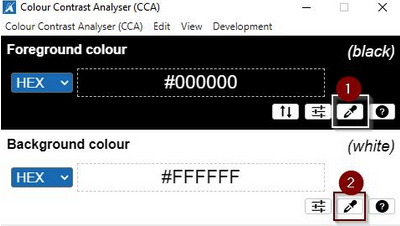
The Colour Contrast Analyser (CCA) is free and available for both Mac and PC. Once downloaded, use the eyedropper to select your foreground and background colors.
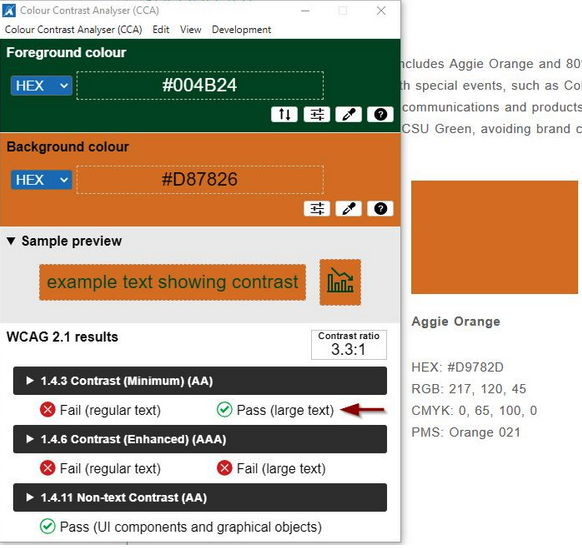
Check the results against WCAG level AA standards. Text is considered large if it is 18pt and larger, or 14pt and larger if it is bold. In this case, the orange and green only pass AA for large text:
The WAVE Tool is a free Chrome extension that has a color contrast checker included. This tool only checks content within a browser. Check the results against WCAG level AA standards.
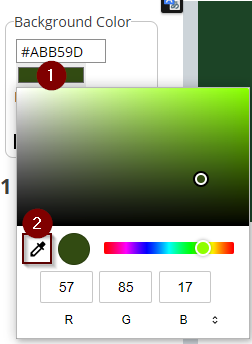
You can use the eyedropper tool to check contrast both in and outside of the browser. Click on the color to input RGB codes or select the eyedropper tool.
Manual Accessibility Testing
After you’ve resolved errors discovered through automated testing, continue on to manual testing. Resolving errors in an automated scan only detects 20-40% of accessibility issues. Since our goal is to be inclusive, we need to ensure that we’re not just compliant to a standard, but that users can reliably access our content. Manual testing is a critical piece of ensuring that your site is actually usable with assistive technology.
There are two steps to manual testing, keyboard and screen reader navigation.
- Keyboard navigation is simple for anyone to try. Simply put your mouse away and see if you can do everything with the keyboard that you would be able to with a mouse.
- Screen reader navigation is more specialized and you may need some training or assistance from the ATRC.
Keyboard navigation
To navigate with a keyboard, use the TAB, ENTER, and Arrow Keys. Use ESCAPE to close items without selecting. Test all of the interactive elements by tabbing through each page:
- Can you see the keyboard focus with sufficient contrast?
- Is the tab order logical?
- Do you get lost anywhere on the page?
- Make sure drop-down menus and any other controls work with TAB, Arrow Keys, and ENTER.
- Image sliders and video: Can you use the controls with the keyboard?
- Forms: Check tab order is logical, and that you can select items and submit using the keyboard.
- Dialog boxes: Can you navigate buttons and dismiss dialog boxes?
Screen reader navigation
For access to JAWS licensing, use the get help form. You can also use free screen readers such as NVDA or VoiceOver, but these instructions focus on JAWS. These are some basic navigation steps for testing with JAWS:
- Start JAWS before opening the Chrome browser.
- Tab through page and listen to make sure the descriptions match what you see.
- Skip Navigation / Skip to Content link should be present and first.
- Does Skip to Content actually go to main content? (Hit Enter, then Down Arrow to begin reading)
- Check for headings (Insert F6). This should be like a Table of Contents, not links.
- Use the headings list to navigate using arrow keys to a Heading level and hit enter. Then press the down arrow to start reading content.
- Check the links list (Insert F7) to see if links make sense out of context.
- Image sliders and video: Are the controls labeled descriptively? Does JAWS read the content on the slides? (Try down arrow if it doesn’t start automatically)
- Forms: Tab through and listen to see if form field labels match. Try submitting and make sure you get verbal notification of success or failure.
- Dialog boxes: Listen to make sure you can hear the message, tab to any options, and dismiss with keyboard. See if keyboard focus returns to a logical location afterwards.
Here is a link for an introduction into html multipage